S/N 21.001
Gummy Cherry Telecaster
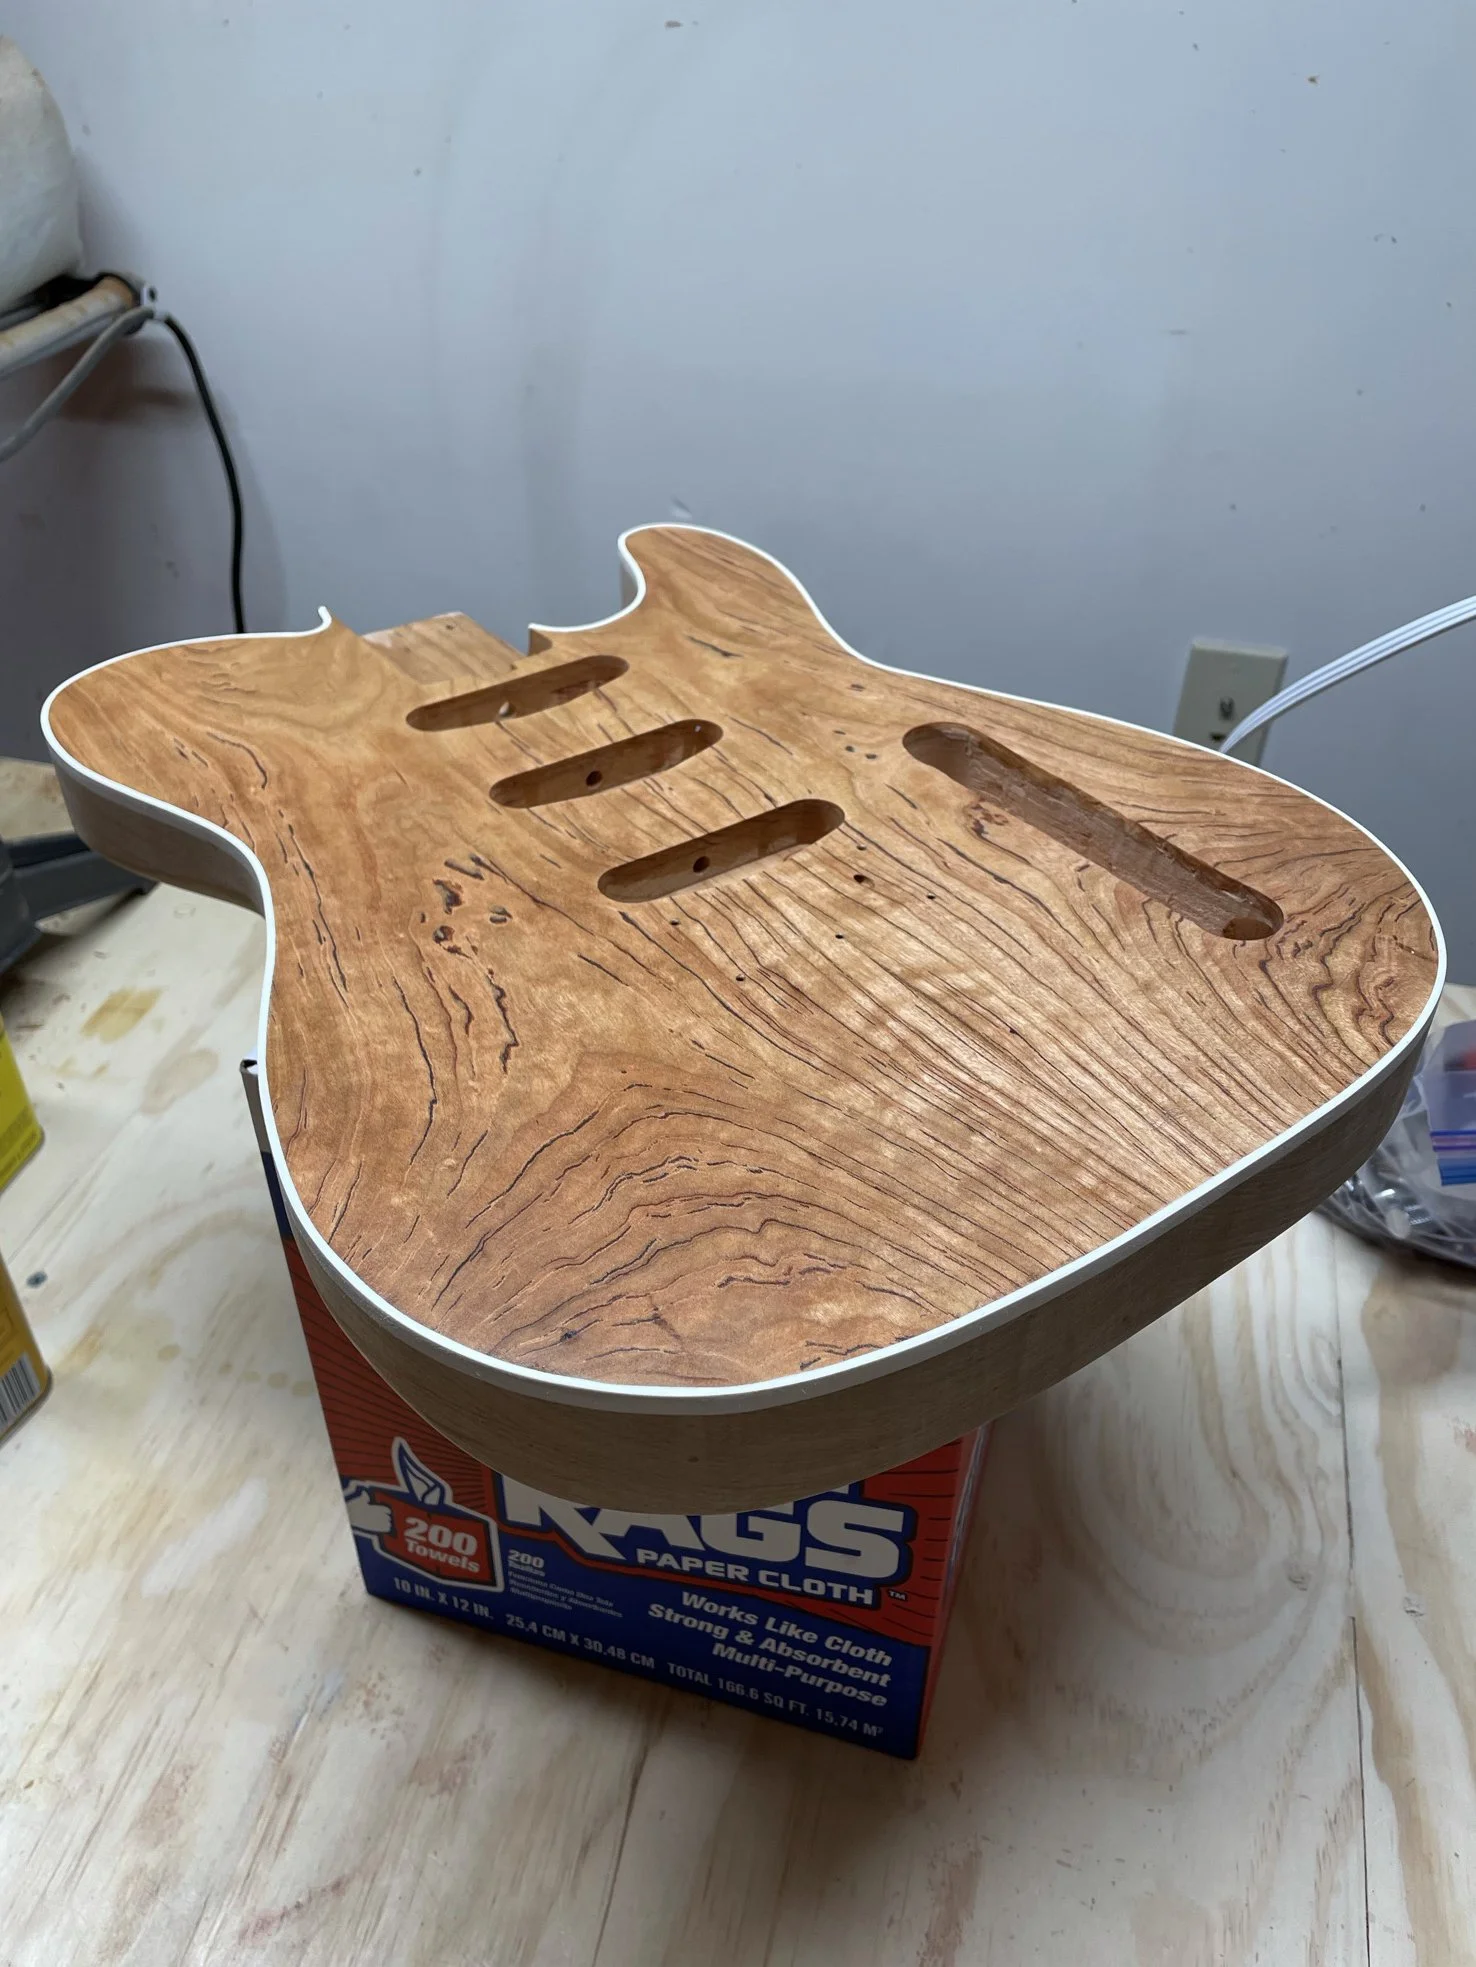
While searching for hardwood to build some guitars, I came across this piece of gummy cherry. Until then, I had never seen or heard of this sort of grain pattern, and knew immediately that it should be used for a guitar body top.
Specifications
25.5” scale length
2 piece cherry body finished with wipe-on poly
2 piece book-matched gummy cherry top finished with wipe-on poly
Maple neck finished with wipe-on poly
Rosewood fingerboard with 1/4” pearl dots
Hardware
Generic bridge, strap buttons, string tree, control cavity plate
This guitar was the end result of a lot of learning. It was a first for almost all parts of the build process:
Template routing the body and cavities
Binding and scraping body
Carving neck (fretboard came thicknessed and pre-slotted, handmade fretboards start with S/N 21.003)
Fretting / leveling frets / slotting nut for strings
Wiring
Because it was a first, there’s a lot of takeaways to consider for future builds:
Curly maple tears out badly when hitting soft grain patterns with a spoke-shave. A sharper blade might help here, a rasp is probably better when approaching final shape.
Cheap hardware is only as good as it costs. The bridge was cheap (~$15), this caused a bit of buzz in the cheap cast-metal saddles.
Truss rod adjustment placement should just be done at the headstock. I exposed the adjustment wheel at the heel of the neck mainly because it meant the router bit for the truss rod channel had an easy entry point. I’ve since learned about a better way to do the headstock truss rod adjustment with S/N 21.003.
Headstock thicknessing and tapering is a bit of an art. For this build I fed the headstock end of the neck into the bandsaw, but ended up taking a bit too much material off which lead to a thin and rough cut (using a resawing blade probably isn’t great for this either). Because of this, I added a bit more gummy cherry as a veneer to the headstock, it actually turned out alright! The catch is that the cherry doesn’t transition very well into the nut, and some of the original maple is exposed. I’ve started to use an oscillating spindle sander to do most of the headstock thicknessing and transition, more on that in a future build.
A cohesive hardware selection really changes how the final product looks. Without an existing inventory of hardware to chose from, I made a few random selections of parts online. This didn’t quite come together the way I hoped: the bridge looks cheap and the control plate is crowded (and arguably backwards).
Overall, this was a great starting point and I learned a lot from it. This guitar has since been disassembled in order to recycle the hardware for future builds, but gummy cherry will definitely come back in a future project!


